FMW 11.1.1.7.0 - Applying Oracle Jdeveloper Patch 20265562: MERGE REQUEST ON TOP OF 11.1.1.7.0 FOR BUGS 19890682 14047857 16632043
- Download Patch 20265562 ( p20265562_111170_Generic.zip )
- Set environment variable ORACLE_HOME to $MW_HOME]/oracle_common
- Stop services
For Standalone JDeveloper install type, shutdown JDeveloper and ensure that Embedded/Integrated WLS Server is also stopped.
For Standalone WLS install type, ensure that WebLogic server is stopped.
Applying Patch 20265562
- Unzip the patch zip file
$ unzip -d PATCH_TOP p20265562_111170_Generic.zip
- $ cd PATCH_TOP/20265562/oui
- Run OPatch apply
- For Standalone JDeveloper install type, start JDeveloper and ensure Embedded/Integrated WLS Server is also started.
- For other install types including standalone WLS, restart Admin Server and Managed Servers.
Patch De-installation
If any issues post patching and rollback is required, follow below steps:
- Change to the directory where the patch was unzipped.
$ cd PATCH_TOP/20265562/oui
- Run OPatch rollback
$ opatch rollback -id 20265562
- Clean contents of tmp directory from $DOMAIN_HOME\servers\DefaultServer\tmp for standalone Jdeveloper installs and from $DOMAIN_HOME/servers/[servername]/tmp for Admin and Managed Servers of other install types
- Start JDeveloper and ensure Embedded WLS Server is also started
Related Posts:
FMW 11.1.1.7.0 - Applying Patch 20805649: REL9 BP16 CUMULATIVE JDEVADF_11.1.1.7.9ADF-FAREL9-BP_GENERIC_150401.1409.6807
Applying Patch 20715966: JDEVADF SECURITY PATCH UPDATE 11.1.1.7.0 (CPUJUL2015)
FMW 11.1.1.7.0 - Applying Patch 18182516: UTF-8 CHARACTERS E3 E80 E81 NOT RECOGNIZED PROPERLY BY B2B
ODSM 11g - Applying Patch 21665104: MERGE REQUEST ON TOP OF 11.1.1.7.0 FOR BUGS 20715966 17191718 to resolve errors java.lang.Exception: MDSLockedSessionManager already registered. Can't register more than one.
Showing posts with label JDev. Show all posts
Showing posts with label JDev. Show all posts
Sunday, 17 January 2016

FMW 11.1.1.6.7 - Applying SOA Patch 12596488: IMPLEMENT GETCOMPONENTSSNAPSHOT() METHOD IN CLASS MEDIATORFACADESERVICE
FMW 11.1.1.6.7 - Applying SOA Patch 12596488: IMPLEMENT GETCOMPONENTSSNAPSHOT() METHOD IN CLASS MEDIATORFACADESERVICE
Pre-requisites
- Ensure Patch 16702086 SOA BUNDLE PATCH 11.1.1.6.7 is already applied
- Ensure all other pre-requisites in Patch Readme file are met
- Download Patch 12596488 (p12596488_111167_Generic.zip)
- Set Environment variables, ORACLE_HOME to SOA_HOME, PATH, etc
Applying Patch 12596488 on SOA Suite Home
- Unzip the patch zip file
$ unzip -d PATCH_TOP p12596488_111167_Generic.zip
- Shutdown all servers (AdminServer and all Managed Servers)
- $ cd PATCH_TOP/12596488/oui
- Run opatch apply
$ opatch apply
- Restart all servers (AdminServer and all Managed servers)
Patch De-Installation
If any issues after applying the patch and a rollback is required, follow below steps:
- Shutdown all servers (AdminServer and all Managed Servers)
- $ cd PATCH_TOP/12596488/oui
- Run opatch rollback
$ opatch rollback -id 12596488
- Restart all servers (AdminServer and all Managed servers)
Applying Patch 12596488 on JDeveloper Home
- Set ORACLE_HOME to your "[MW_HOME]/jdeveloper" directory.
- Shutdown JDeveloper and make sure that the Embedded/Integrated WLS Server is
also stopped.
Applying Patch on JDev Home
- Unzip the patch zip file into the PATCH_TOP.
$ unzip -d PATCH_TOP p12596488_111167_Generic.zip
- $ cd PATCH_TOP/12596488/sa
$ opatch apply -jdk [Path to jdk] -jre [Path to jre]
- Start JDeveloper and make sure that the Embedded WLS Server is also started.
Patch De-Installation
If any issues after applying the patch and a rollback is required, follow below steps:
- Shutdown JDeveloper and make sure that the Embedded/Integrated WLS Server is
also stopped.
$ opatch rollback -id 12596488
- Clean tmp directory contents from the domain
[JDEV_USER_DIR]\DefaultDomain\servers\DefaultServer\tmp\*
- Start JDeveloper and make sure that the Embedded WLS Server is also started.
Pre-requisites
- Ensure Patch 16702086 SOA BUNDLE PATCH 11.1.1.6.7 is already applied
- Ensure all other pre-requisites in Patch Readme file are met
- Download Patch 12596488 (p12596488_111167_Generic.zip)
- Set Environment variables, ORACLE_HOME to SOA_HOME, PATH, etc
Applying Patch 12596488 on SOA Suite Home
- Unzip the patch zip file
$ unzip -d PATCH_TOP p12596488_111167_Generic.zip
- Shutdown all servers (AdminServer and all Managed Servers)
- $ cd PATCH_TOP/12596488/oui
- Run opatch apply
$ opatch apply
- Restart all servers (AdminServer and all Managed servers)
Patch De-Installation
If any issues after applying the patch and a rollback is required, follow below steps:
- Shutdown all servers (AdminServer and all Managed Servers)
- $ cd PATCH_TOP/12596488/oui
- Run opatch rollback
$ opatch rollback -id 12596488
- Restart all servers (AdminServer and all Managed servers)
Applying Patch 12596488 on JDeveloper Home
- Set ORACLE_HOME to your "[MW_HOME]/jdeveloper" directory.
- Shutdown JDeveloper and make sure that the Embedded/Integrated WLS Server is
also stopped.
Applying Patch on JDev Home
- Unzip the patch zip file into the PATCH_TOP.
$ unzip -d PATCH_TOP p12596488_111167_Generic.zip
- $ cd PATCH_TOP/12596488/sa
$ opatch apply -jdk [Path to jdk] -jre [Path to jre]
- Start JDeveloper and make sure that the Embedded WLS Server is also started.
Patch De-Installation
If any issues after applying the patch and a rollback is required, follow below steps:
- Shutdown JDeveloper and make sure that the Embedded/Integrated WLS Server is
also stopped.
$ opatch rollback -id 12596488
- Clean tmp directory contents from the domain
[JDEV_USER_DIR]\DefaultDomain\servers\DefaultServer\tmp\*
- Start JDeveloper and make sure that the Embedded WLS Server is also started.
Related Posts:
Applying Patch 20900599: SOA Bundle Patch 12.1.3.0.3
Applying Patch 20423535: SOA Bundle Patch 11.1.1.7.7
Applying Patch 19953598: SOA Bundle Patch 11.1.1.7.6
Applying Patch 19190139 SOA BUNDLE PATCH 11.1.1.7.5
Applying Patch 18609527 SOA BUNDLE PATCH 11.1.1.7.4
Applying Patch 18072286 SOA BUNDLE PATCH 11.1.1.7.3
Applying Patch 17584181 SOA BUNDLE PATCH 11.1.1.7.2
FMW 11.1.1.6.0 - Applying Patch 16702086: SOA BUNDLE PATCH 11.1.1.6.7
Applying Patch 20900599: SOA Bundle Patch 12.1.3.0.3
Applying Patch 20423535: SOA Bundle Patch 11.1.1.7.7
Applying Patch 19953598: SOA Bundle Patch 11.1.1.7.6
Applying Patch 19190139 SOA BUNDLE PATCH 11.1.1.7.5
Applying Patch 18609527 SOA BUNDLE PATCH 11.1.1.7.4
Applying Patch 18072286 SOA BUNDLE PATCH 11.1.1.7.3
Applying Patch 17584181 SOA BUNDLE PATCH 11.1.1.7.2
FMW 11.1.1.6.0 - Applying Patch 16702086: SOA BUNDLE PATCH 11.1.1.6.7
Thursday, 20 August 2015
Applying Patch 20715966: JDEVADF SECURITY PATCH UPDATE 11.1.1.7.0 (CPUJUL2015)
Applying Patch 20715966: JDEVADF SECURITY PATCH UPDATE 11.1.1.7.0 (CPUJUL2015)
Applying Patch 20715966: JDEVADF SECURITY PATCH UPDATE 11.1.1.7.0 (CPUJUL2015)
- Review and download the latest version of OPatch to
a) For Standalone JDeveloper/Standalone WLS install type: Download the latest version of OPatch(11.1.0.0.0) via BUG 5912518
b) b) For OUI (WebCenter/SOA/Classic/etc) install type: Download the latest version of OPatch (11.1.0.8.3 or higher) via BUG 6880880
- Ensure access to valid OUI Inventory by running opatch lsinventory
- Validate the executables in system PATH like 'which opatch', 'which unzip'
- Ensure Perl is 5.00503 or higher by sourcing ORACLE_HOME and running 'perl -v'
- For standalone Jdeveloper install or standalone WebLogic install types make sure that WLS server is stopped.
Applying Patch
1. Unzip the patch 20715966 zip file into the PATCH_TOP.
$ unzip -d PATCH_TOP p20715966_111170_Generic.zip
2. cd PATCH_TOP/20715966/oui
3. Apply patch (Take cold backup as applicable, recommended though not mandatory)
i) For OUI HOME, run opatch apply
ii) For standalone JDeveloper Home, run opatch apply -jdk <jdk_path> -jre <jre_path>
4. If Patch is successful, restart MT services - Admin & Managed Servers for OUI Home, Restart Jdeveloper and Integrated WLS for standalone Jdev Home.
5. Clearing tmp directory recommended post patching and before restarting services.
For standalone JDev Home -
Default location of tmp => [JDEV_USER_DIR]\DefaultDomain\servers\DefaultServer\tmp\*
For OUI Home - Default location of tmp =>
[MW_HOME]/user_projects/domains/[DOMAIN_NAME]/servers/[SERVER NAME]/tmp/*
Patch rollback
If patch fails for some reason, rollback the patch and restart MT services.
$ opatch rollback -id 20715966 -jdk <jdk_path> -jre <jre_path>
Clearing tmp directory recommended post rollback before restarting services.
For standalone JDev Home -
Default location of tmp => [JDEV_USER_DIR]\DefaultDomain\servers\DefaultServer\tmp\*
For OUI Home - Default location of tmp =>
[MW_HOME]/user_projects/domains/[DOMAIN_NAME]/servers/[SERVER NAME]/tmp/*
Related Posts:
FMW 11.1.1.7.0 - Applying Patch 18182516: UTF-8 CHARACTERS E3 E80 E81 NOT RECOGNIZED PROPERLY BY B2B
FMW 11.1.1.7.0 - Applying Oracle Jdeveloper Patch 20265562: MERGE REQUEST ON TOP OF 11.1.1.7.0 FOR BUGS 19890682 14047857 16632043
Applying Patch 20715966: JDEVADF SECURITY PATCH UPDATE 11.1.1.7.0 (CPUJUL2015)
- Review and download the latest version of OPatch to
a) For Standalone JDeveloper/Standalone WLS install type: Download the latest version of OPatch(11.1.0.0.0) via BUG 5912518
b) b) For OUI (WebCenter/SOA/Classic/etc) install type: Download the latest version of OPatch (11.1.0.8.3 or higher) via BUG 6880880
- Ensure access to valid OUI Inventory by running opatch lsinventory
- Validate the executables in system PATH like 'which opatch', 'which unzip'
- Ensure Perl is 5.00503 or higher by sourcing ORACLE_HOME and running 'perl -v'
- For standalone Jdeveloper install or standalone WebLogic install types make sure that WLS server is stopped.
Applying Patch
1. Unzip the patch 20715966 zip file into the PATCH_TOP.
$ unzip -d PATCH_TOP p20715966_111170_Generic.zip
2. cd PATCH_TOP/20715966/oui
3. Apply patch (Take cold backup as applicable, recommended though not mandatory)
i) For OUI HOME, run opatch apply
ii) For standalone JDeveloper Home, run opatch apply -jdk <jdk_path> -jre <jre_path>
4. If Patch is successful, restart MT services - Admin & Managed Servers for OUI Home, Restart Jdeveloper and Integrated WLS for standalone Jdev Home.
5. Clearing tmp directory recommended post patching and before restarting services.
For standalone JDev Home -
Default location of tmp => [JDEV_USER_DIR]\DefaultDomain\servers\DefaultServer\tmp\*
For OUI Home - Default location of tmp =>
[MW_HOME]/user_projects/domains/[DOMAIN_NAME]/servers/[SERVER NAME]/tmp/*
Patch rollback
If patch fails for some reason, rollback the patch and restart MT services.
$ opatch rollback -id 20715966 -jdk <jdk_path> -jre <jre_path>
Clearing tmp directory recommended post rollback before restarting services.
For standalone JDev Home -
Default location of tmp => [JDEV_USER_DIR]\DefaultDomain\servers\DefaultServer\tmp\*
For OUI Home - Default location of tmp =>
[MW_HOME]/user_projects/domains/[DOMAIN_NAME]/servers/[SERVER NAME]/tmp/*
Related Posts:
FMW 11.1.1.7.0 - Applying Patch 18182516: UTF-8 CHARACTERS E3 E80 E81 NOT RECOGNIZED PROPERLY BY B2B
FMW 11.1.1.7.0 - Applying Oracle Jdeveloper Patch 20265562: MERGE REQUEST ON TOP OF 11.1.1.7.0 FOR BUGS 19890682 14047857 16632043
Tuesday, 10 December 2013
Installing Oracle JDeveloper 11.1.1.7.0 Studio Edition (Oracle JDeveloper 11g R1 Patch Set 6)
Installing Oracle JDeveloper 11.1.1.7.0 (Oracle JDeveloper 11g R1 Patch Set 6)
For Installing Oracle JDeveloper 11.1.1.6.0 (Oracle JDeveloper 11g R1 Patch Set 5), refer to blog post here.
1) Download and invoke the installer

2) Choose Middleware Home Directory.

3) Choose Install Type. Choose Complete to install Jdeveloper and ADF, Weblogic Server

4) Choose Products and Components

5) JDK Selection

6) Confirm Product Installation Directories
7) Install Windows Service

8) Choose Shortcut Location

9) Installation Summary

10) Installation Progress

11) Installation Complete

For Installing Oracle JDeveloper 11.1.1.6.0 (Oracle JDeveloper 11g R1 Patch Set 5), refer to blog post here.
1) Download and invoke the installer

2) Choose Middleware Home Directory.

3) Choose Install Type. Choose Complete to install Jdeveloper and ADF, Weblogic Server

4) Choose Products and Components

5) JDK Selection

6) Confirm Product Installation Directories

7) Install Windows Service

8) Choose Shortcut Location

9) Installation Summary

10) Installation Progress

11) Installation Complete

Friday, 29 March 2013
Installing Oracle JDeveloper 11.1.1.6.0 (Oracle JDeveloper 11g R1 Patch Set 5)
Installing Oracle JDeveloper 11.1.1.6.0 (Oracle JDeveloper 11g R1 Patch Set 5)
For Installing Oracle JDeveloper 11.1.1.7.0 Studio Edition (Oracle JDeveloper 11g R1 Patch Set 6), refer to the blog post here.
This patchset contains some new features mostly on the ADF Faces area and they include:
- Support for HTML 5 rendering for the data visualization components
- Support for touch gestures when accessing ADF Faces from an iPad
- Better support for search engines and Web crawling.
This version also includes the infrastructure for Oracle JDeveloper deployment to the upcoming Oracle Cloud.
Depending on the type of installer you are using, you can begin the installation process in one of the following ways:
■ To launch the platform-independent installer, enter: java -jar
jdevstudio11116install.jar.
■ To launch the Windows installer, double-click the
jdevstudio11116install.exe file.
■ To launch the Linux installer, follow these steps:
1. Ensure that the jdevstudio11116install.bin file is executable: chmod
+x jdevstudio11116install.bin.
2. Execute the file: ./jdevstudio11116install.bin.
You can also launch the installer in silent mode, to ensure that no configuration options are displayed during the installation process
Download Oracle JDeveloper 11.1.1.6.0
Oracle JDeveloper 11.1.1.6.0 Install Guide
Installation
============
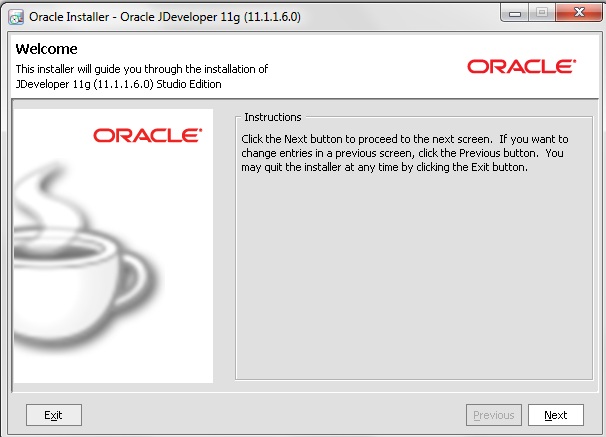
1. Welcome
Click Next to begin the installation process.
2. Choose Middleware Home Directory

3. Choose Install Type
Select either Complete or Custom depending on the type of installation you want to perform.

4. Choose Products and Components (Custom Install only)
5. JDK Selection (Generic Installer only)
6. Confirm Product Installation Directories

7. Choose Shortcut Location (Windows systems only)

8. Installation Summary

9. Installation status
10. Installation Complete
For Installing Oracle JDeveloper 11.1.1.7.0 Studio Edition (Oracle JDeveloper 11g R1 Patch Set 6), refer to the blog post here.
This patchset contains some new features mostly on the ADF Faces area and they include:
- Support for HTML 5 rendering for the data visualization components
- Support for touch gestures when accessing ADF Faces from an iPad
- Better support for search engines and Web crawling.
This version also includes the infrastructure for Oracle JDeveloper deployment to the upcoming Oracle Cloud.
Depending on the type of installer you are using, you can begin the installation process in one of the following ways:
■ To launch the platform-independent installer, enter: java -jar
jdevstudio11116install.jar.
■ To launch the Windows installer, double-click the
jdevstudio11116install.exe file.
■ To launch the Linux installer, follow these steps:
1. Ensure that the jdevstudio11116install.bin file is executable: chmod
+x jdevstudio11116install.bin.
2. Execute the file: ./jdevstudio11116install.bin.
You can also launch the installer in silent mode, to ensure that no configuration options are displayed during the installation process
Download Oracle JDeveloper 11.1.1.6.0
Oracle JDeveloper 11.1.1.6.0 Install Guide
Installation
============
1. Welcome
Click Next to begin the installation process.

2. Choose Middleware Home Directory

3. Choose Install Type
Select either Complete or Custom depending on the type of installation you want to perform.

4. Choose Products and Components (Custom Install only)
5. JDK Selection (Generic Installer only)
6. Confirm Product Installation Directories

7. Choose Shortcut Location (Windows systems only)

8. Installation Summary

9. Installation status
10. Installation Complete
Subscribe to:
Posts (Atom)